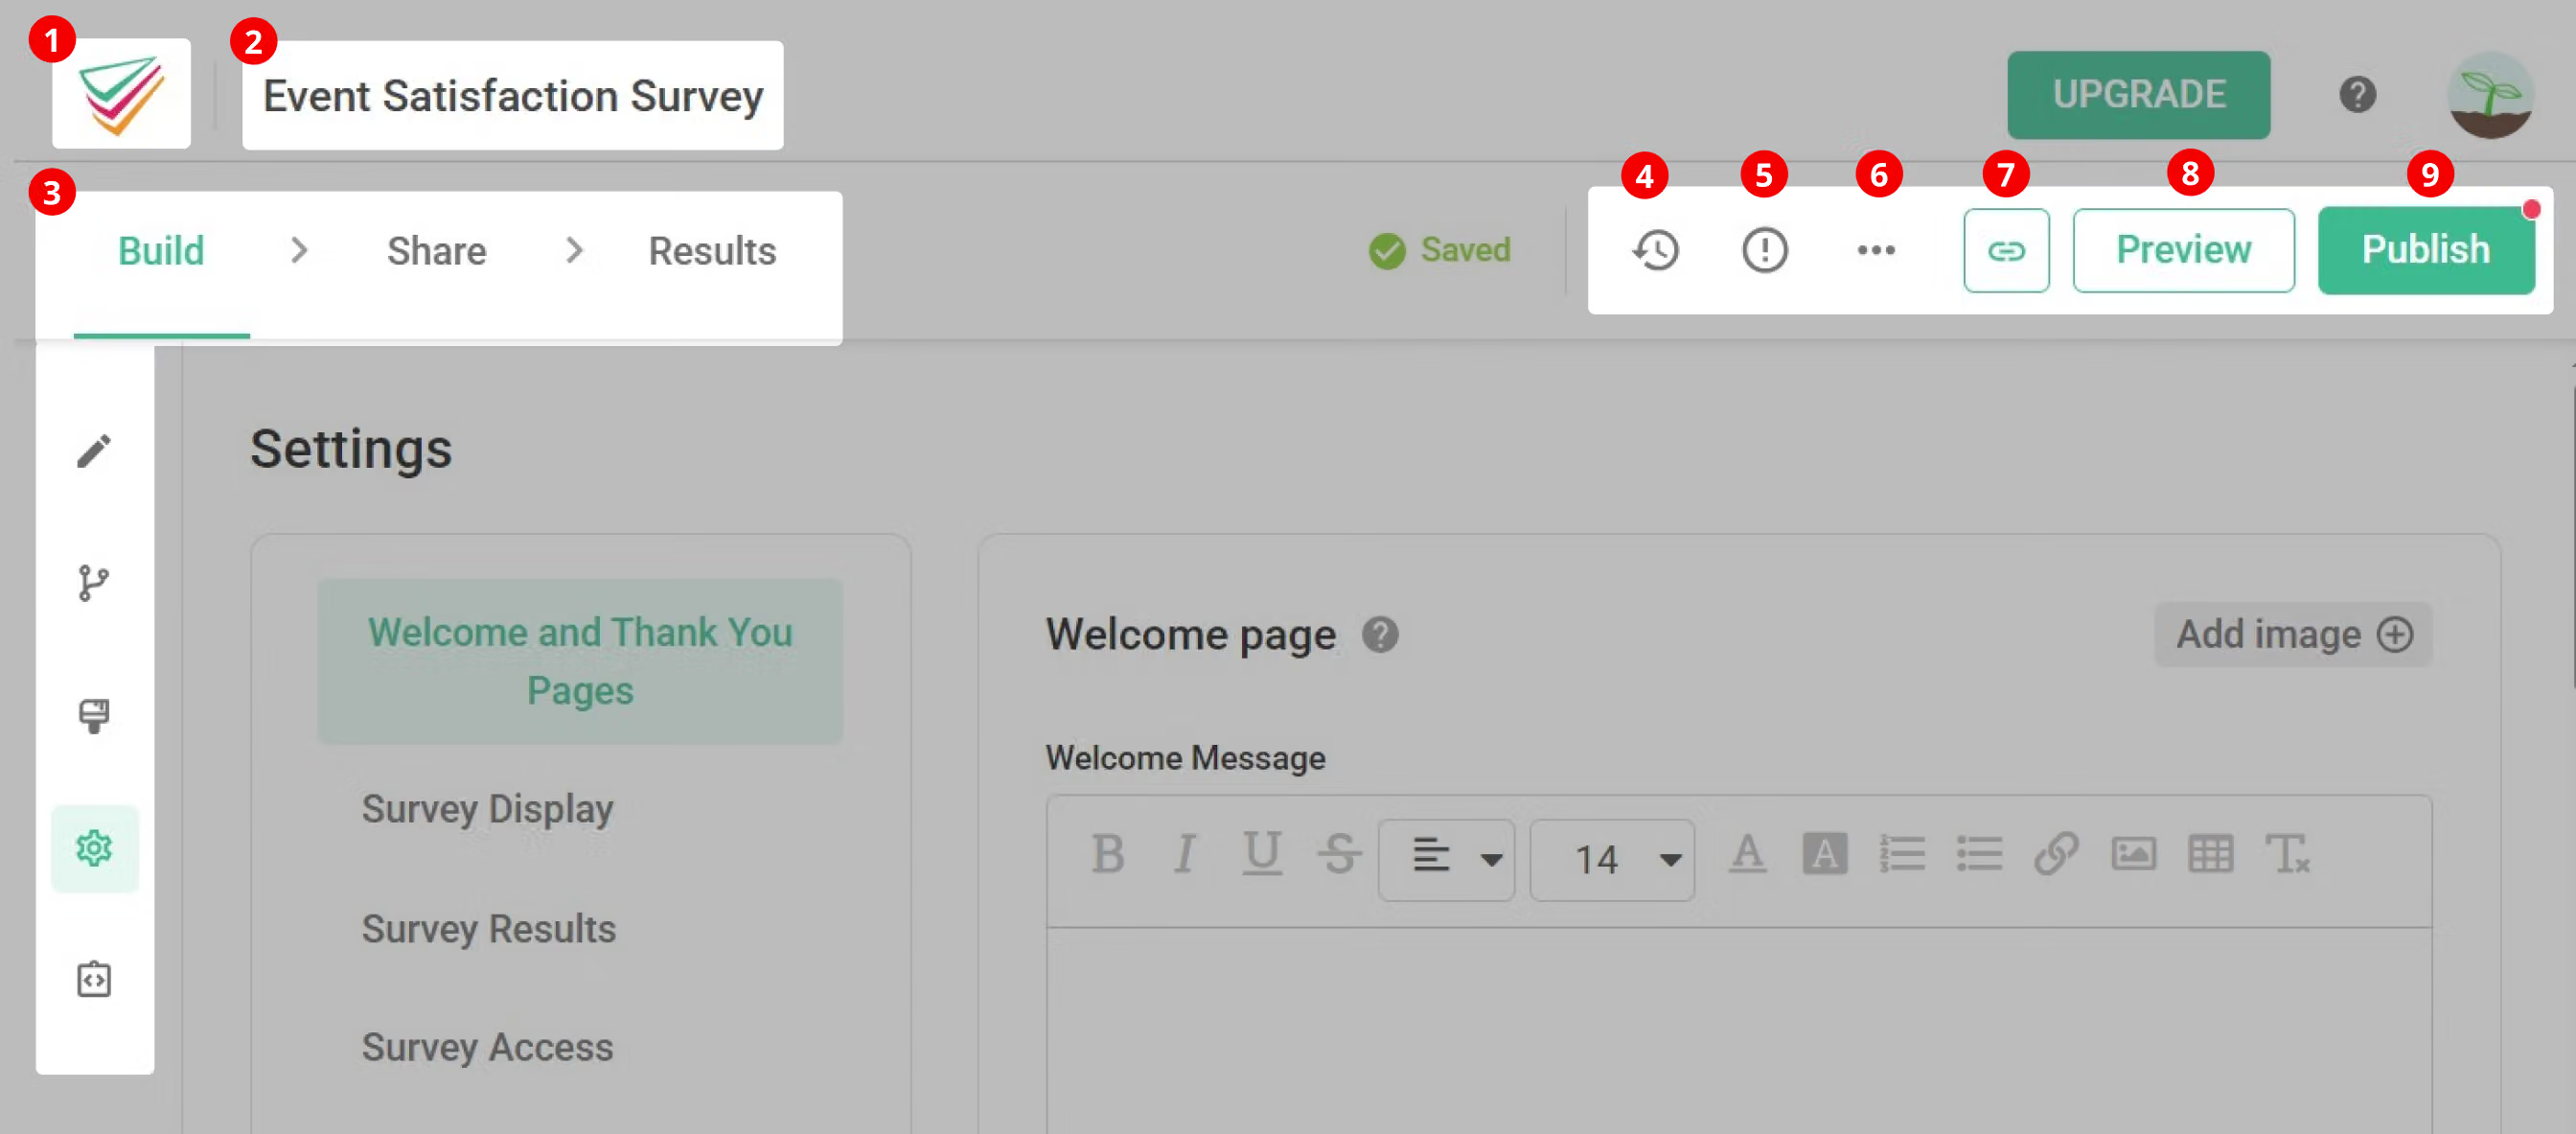
After creating a new survey in SurveyCake, the first step will take you to the "Build" page. Click the "Settings" button in the sidebar to enter the "Settings" page, which includes the following features:
SurveyCake Logo: Click to return to the dashboard
Survey Title: Click to edit the survey title. After opening the title settings window, if you click "Publish Title," only the title will be published to the live survey. Other draft edits (e.g., modified questions or options) will not be published simultaneously.
Survey Progress Steps : Click to switch between each step of creating a survey
Reminder: It shows the parts that need correction found by the system, like unset fields or incorrect format. The changes will only be saved and the survey can be published after they are made.
6.More Options: Click to see more options
Survey Link:After clicking the button, it will directly copy the survey's official URL link.
Note: The features with a blue lock icon are PRO features. To enable them, you'll need to upgrade to a PRO account. Enjoy 14-day free trial on the first time you subscribe to PRO, upgrade now!
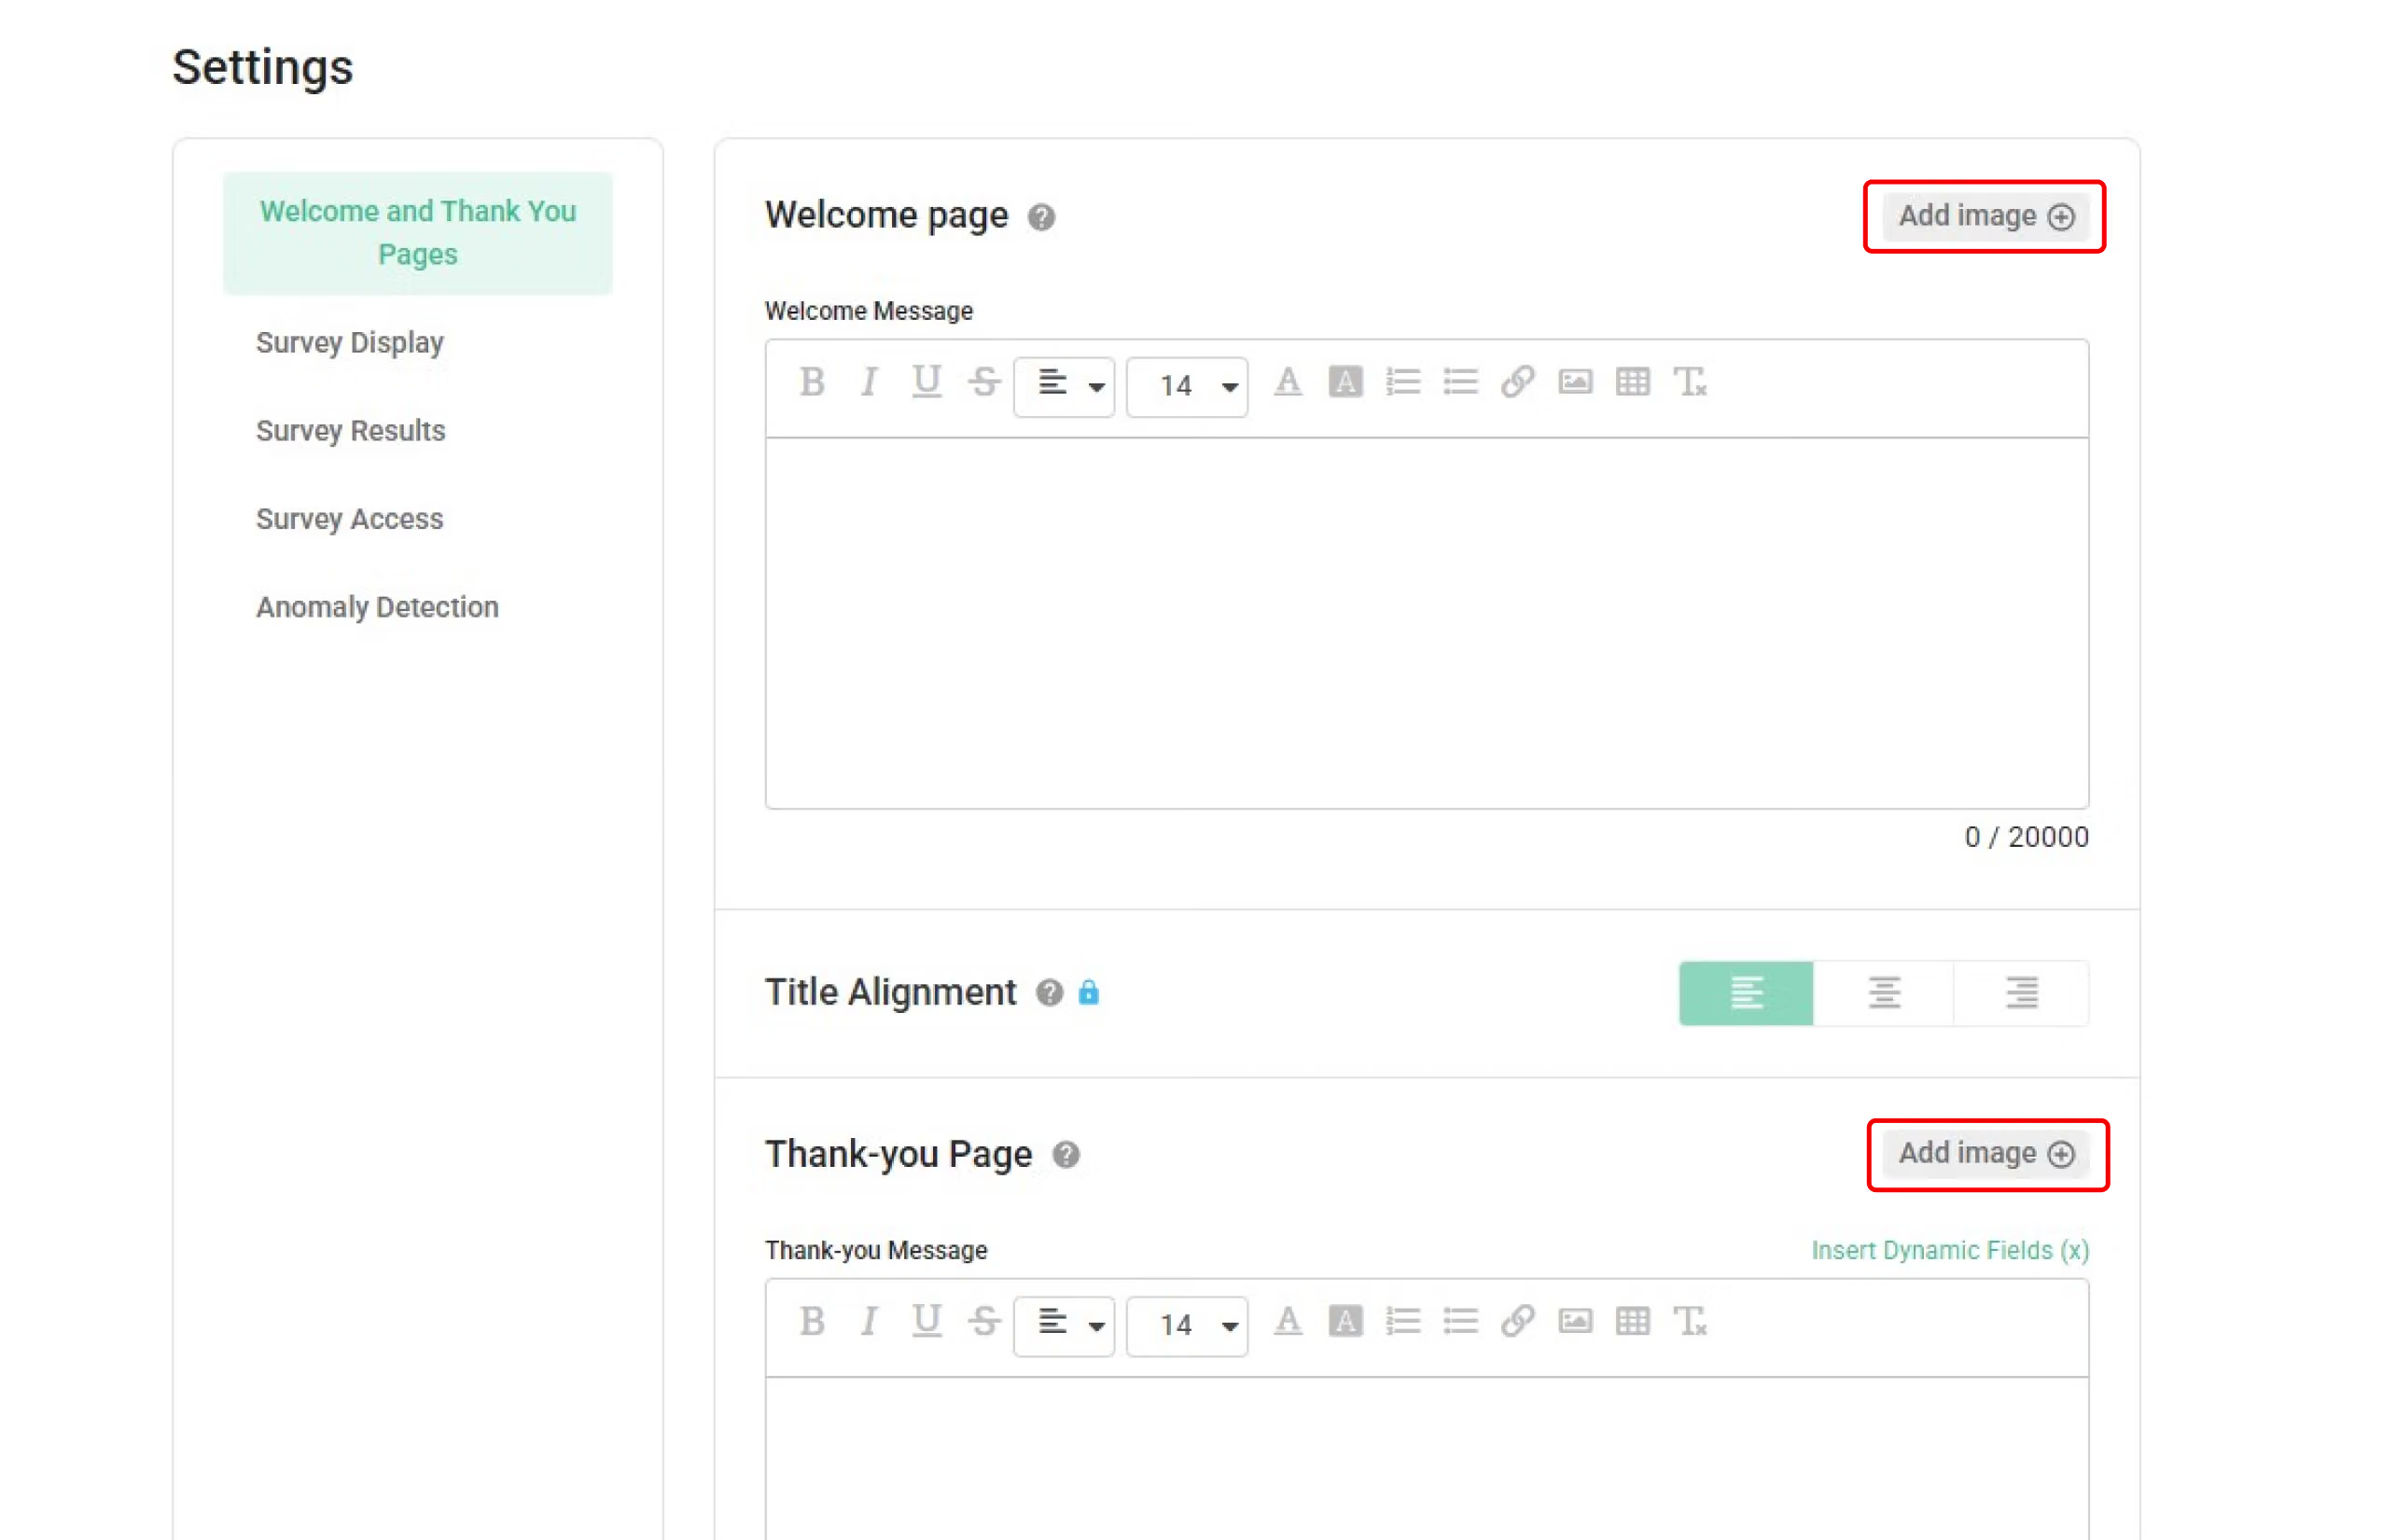
Welcome and Thank-You Page
Welcome page: The picture that the respondents will see before filling in the survey, which will appear at the top of the survey homepage
Welcome Message: The message for the respondents before filling in the survey, which will appear on the homepage of the survey
Title Alignment: The title alignment of the survey can be aligned to left, center, and right
Thank-you Page: The picture that the respondents will see after submitting the survey, which will appear at the top of the survey's Thank You Page
Thank You Message: The message for the respondents after they submit the survey, which will appear on the Thank You Page
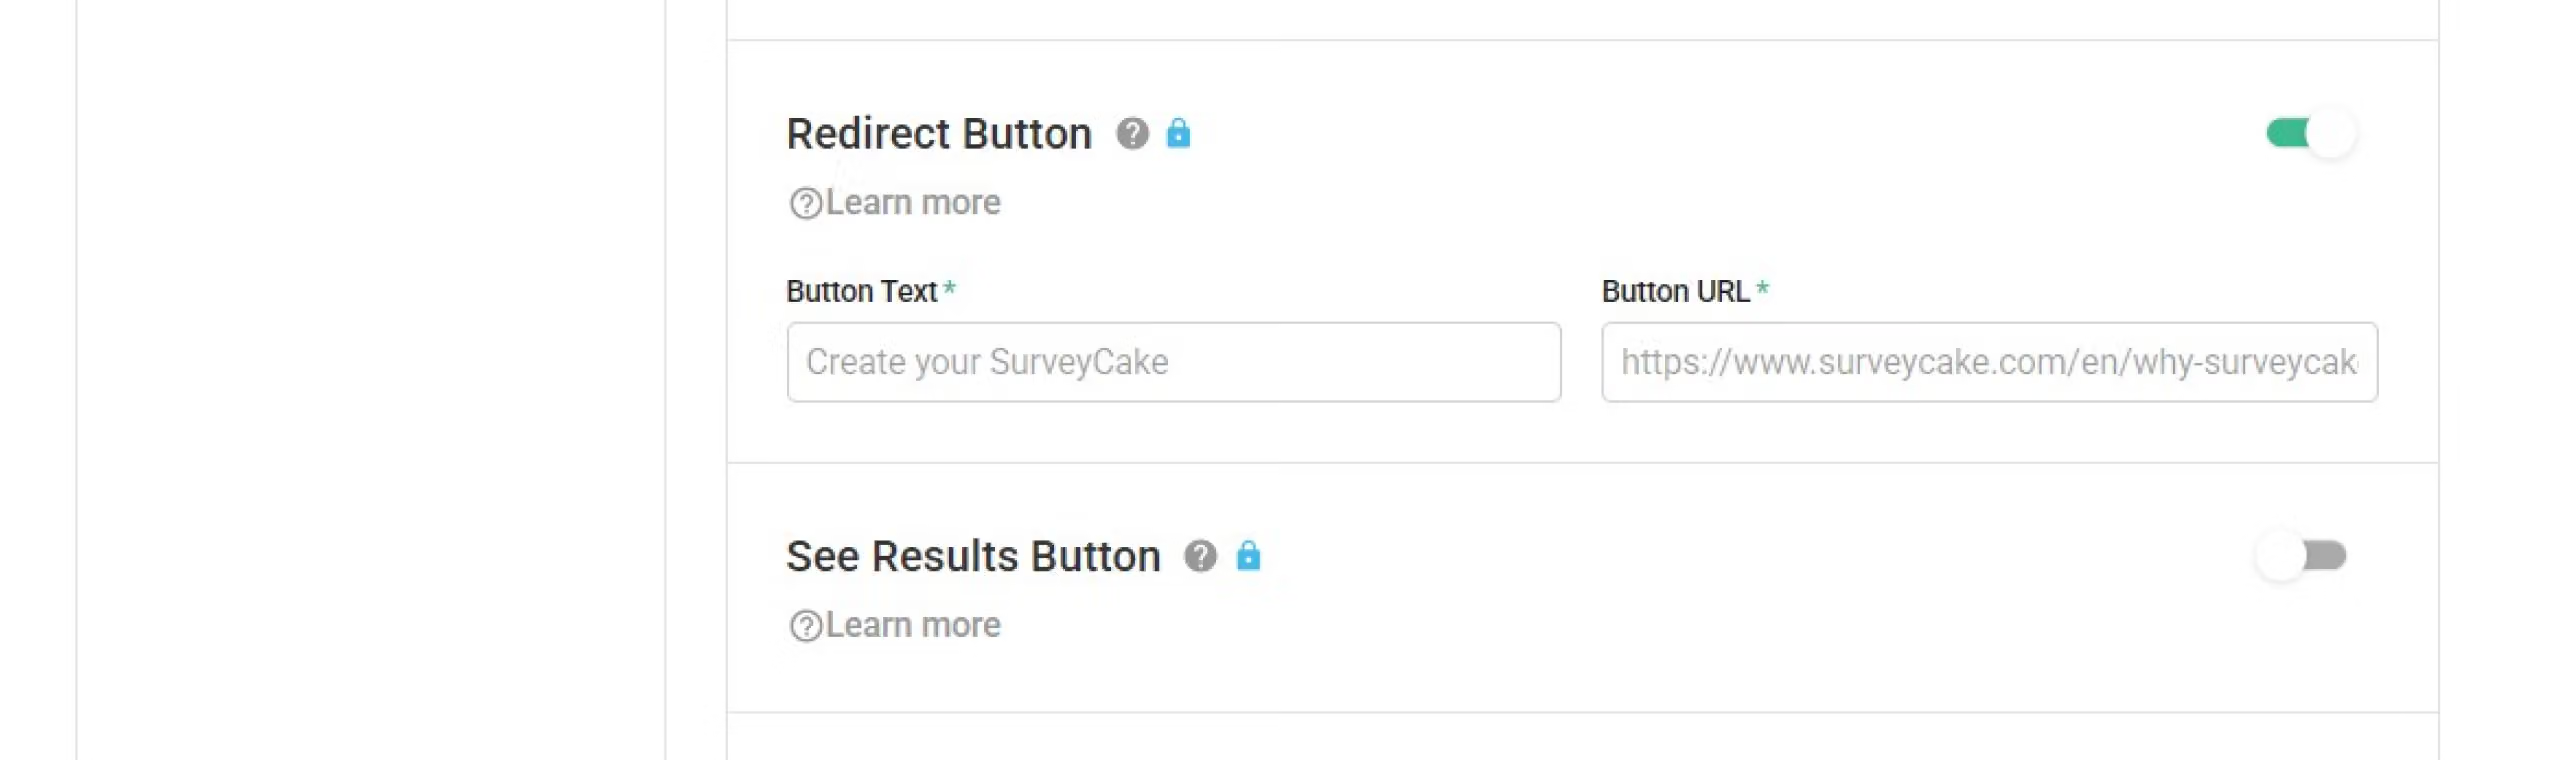
Redirect Button: You can set a redirect button on the Thank You Page. When the respondents click it after submitting the survey, they will be redirected to the page you have set up
See Results Button: When this function is activated, there will be an additional See Results Button on the Thank-You Page. After the respondents submit the survey, they can click the “View Survey Results” button to see the survey's real-time chart report
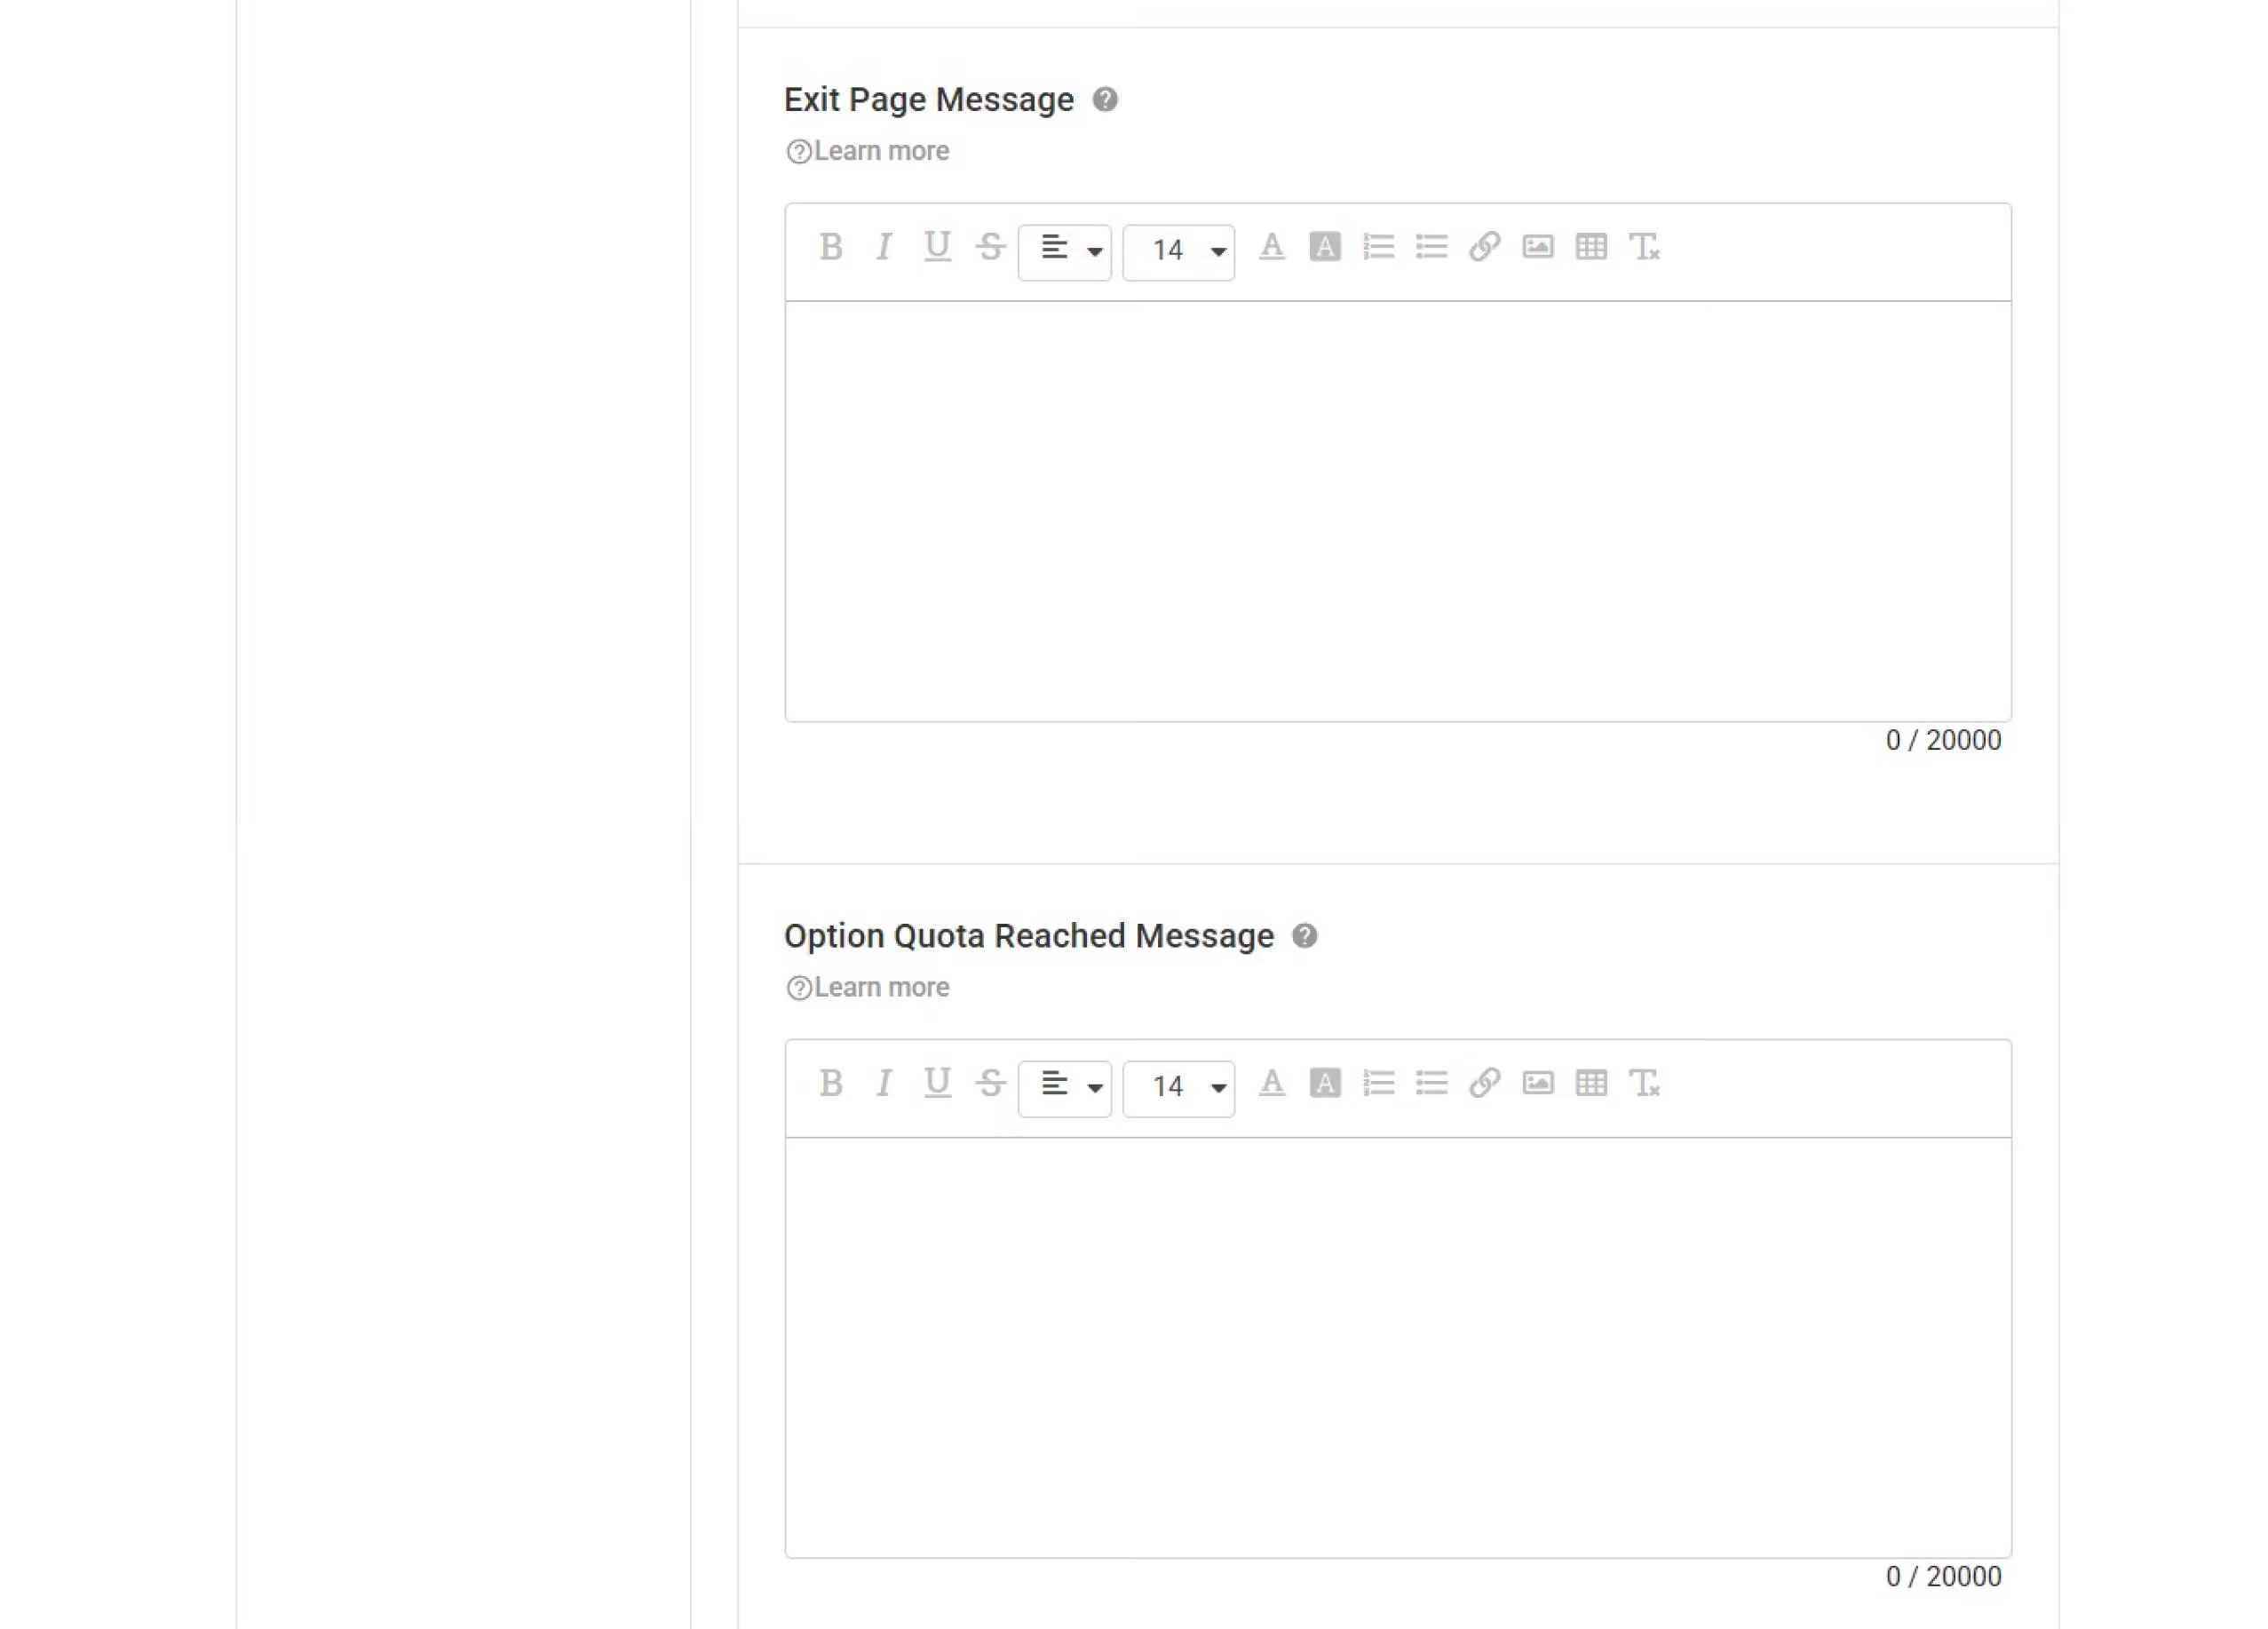
Exit Page Message: The message will be seen by the respondents who skipped to the exit page through Skip-to link
Option Quota Reached Message: The explanatory text that the respondents will see on the Overflow page, when the multiple choice option reaches the maximum quota
Survey Display
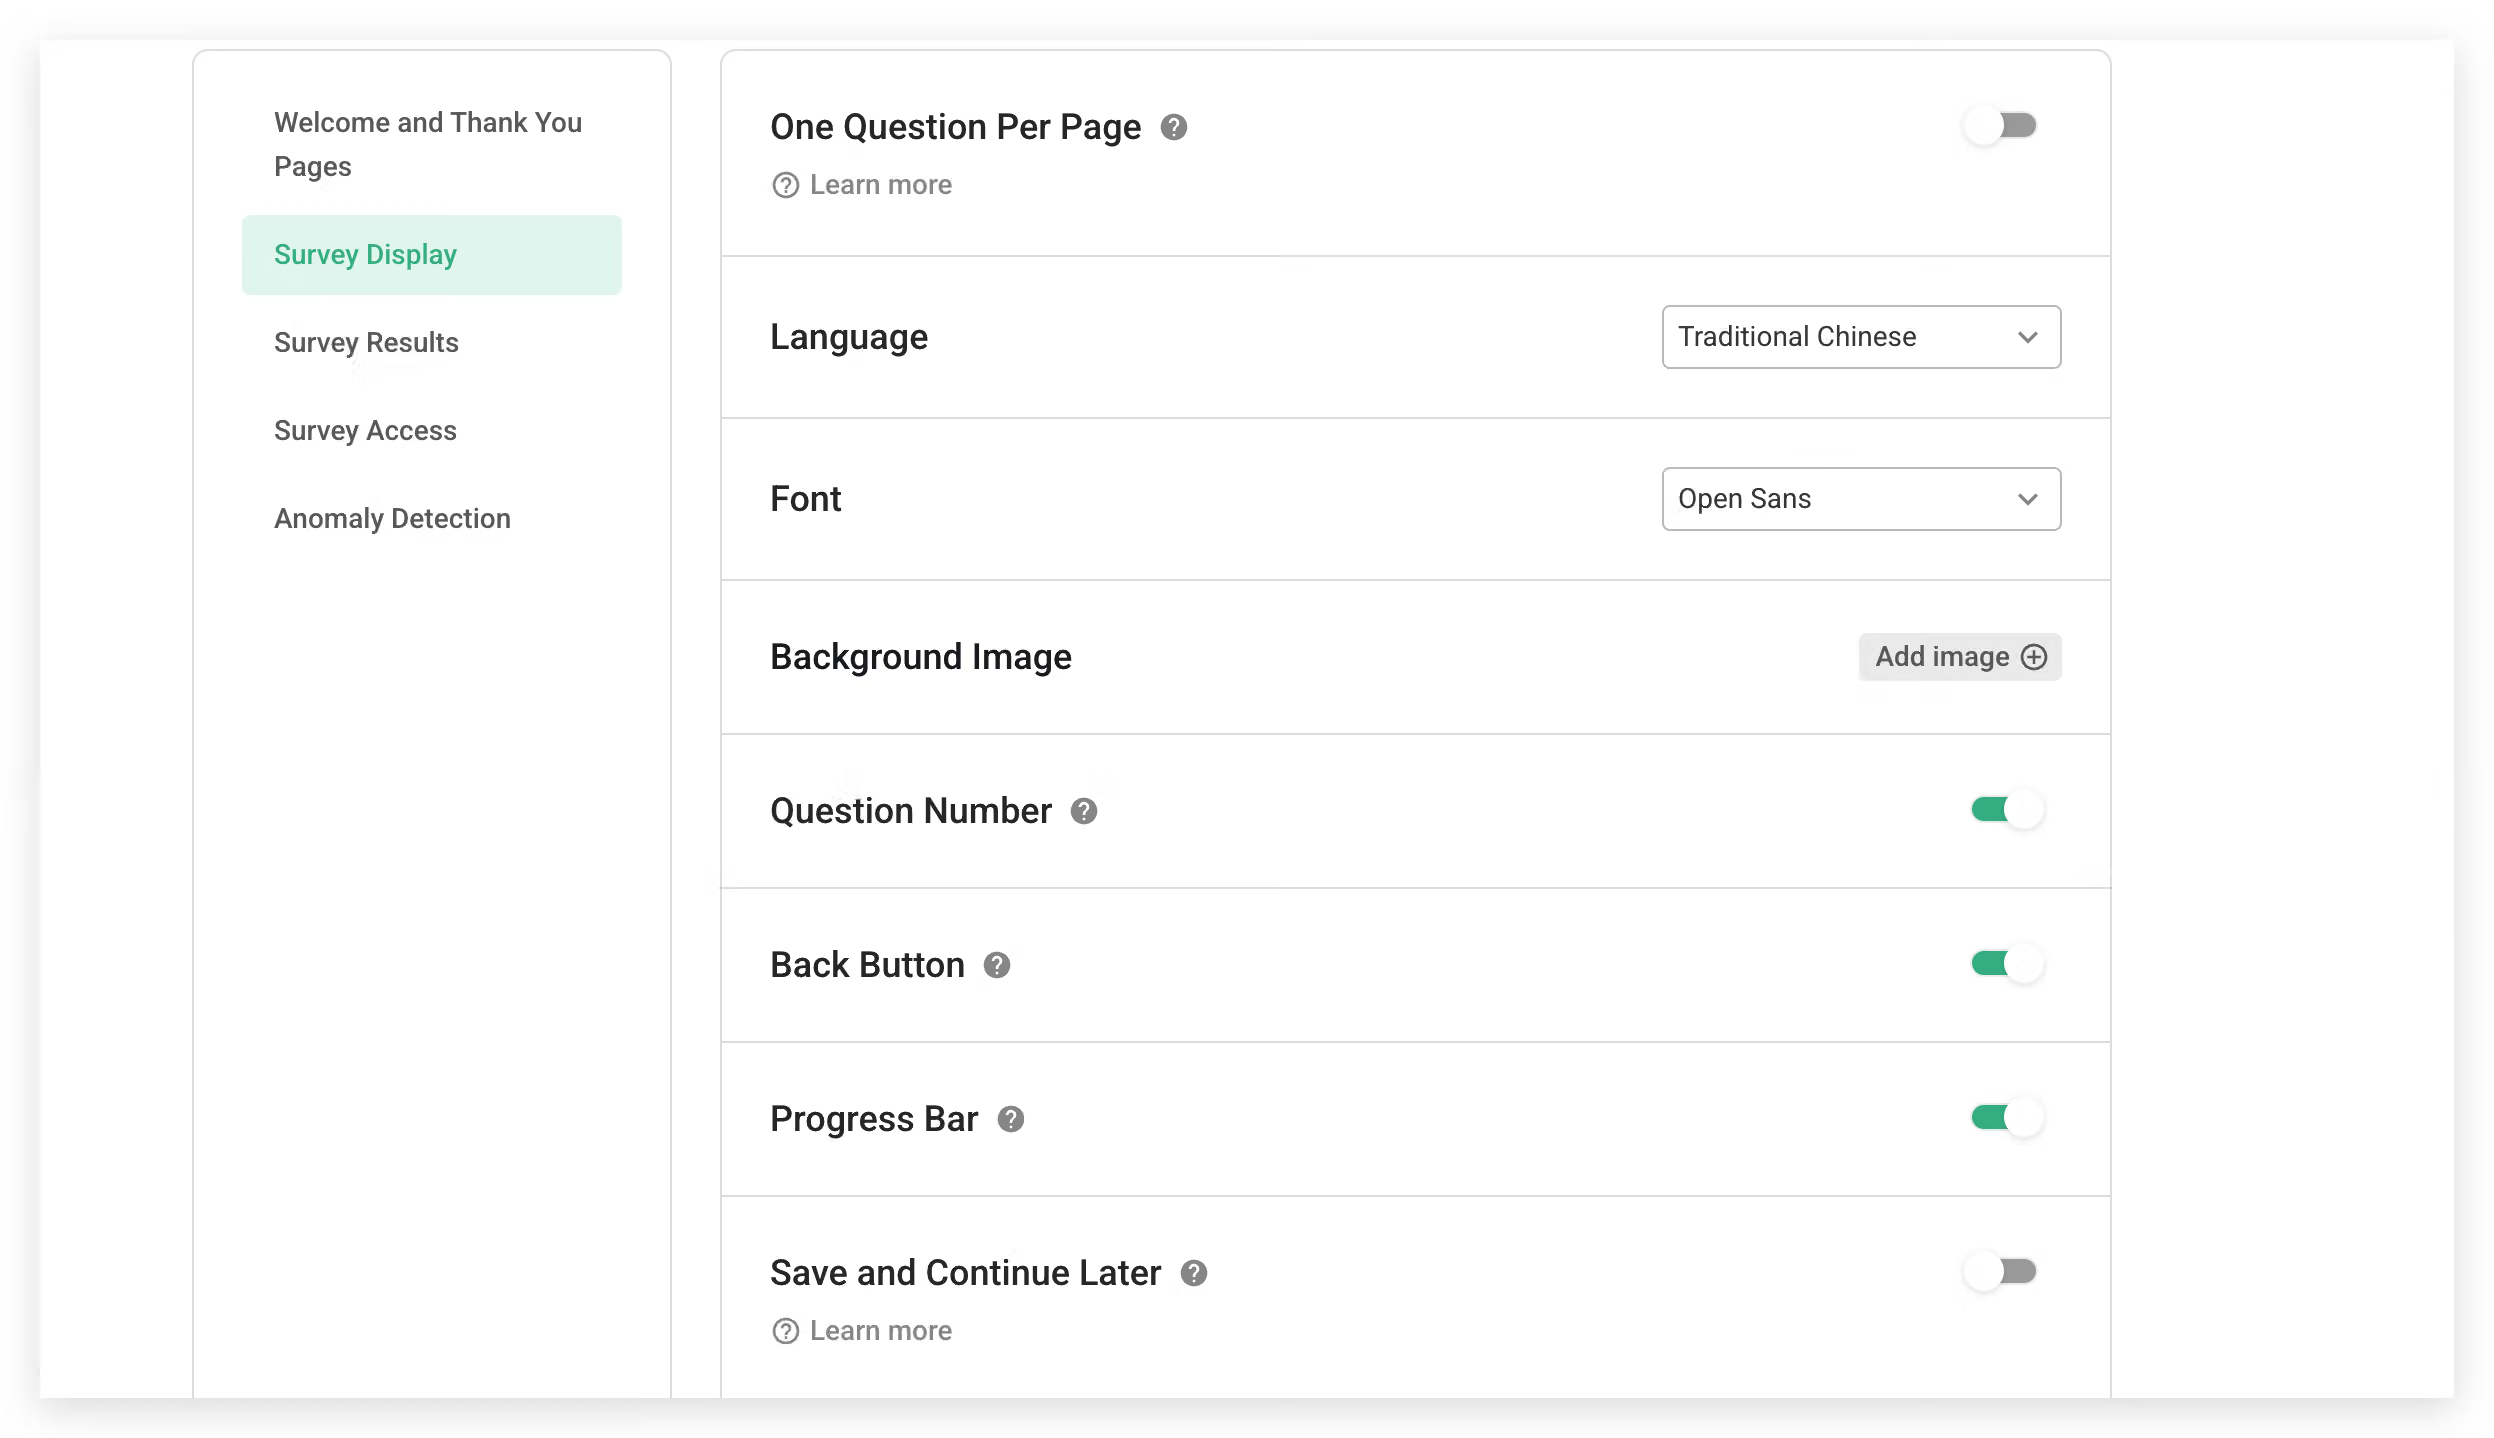
One Question Per Page: When One Question Per Page is turned off, the survey is displayed in custom paging (default mode). If One Question Per Page is turned on, each page will display only one question or one question group.
Language: The language of the default survey text (e.g., submit button, placeholder, etc.)
Font: Adjust the font style displayed throughout the survey.
Background Image: The picture that the respondents will see when filling in the survey, which will appear on the background of the survey page on the desktop version
Question Number: Make the question number visible or invisible. Hiding the question number can prevent the skip logic of your survey from being detected by the respondents
Back Button: When the survey has several pages, you can choose whether or not to display the "Previous Page" button.
Progress Bar: Make the filling progress visible or invisible. The current filling progress will be shown in real-time in the lower left once the button is turned on.
Save and Continue Later:Allows respondents to pause midway through the survey and resume filling it out later by clicking the same link, effectively increasing completion rates.
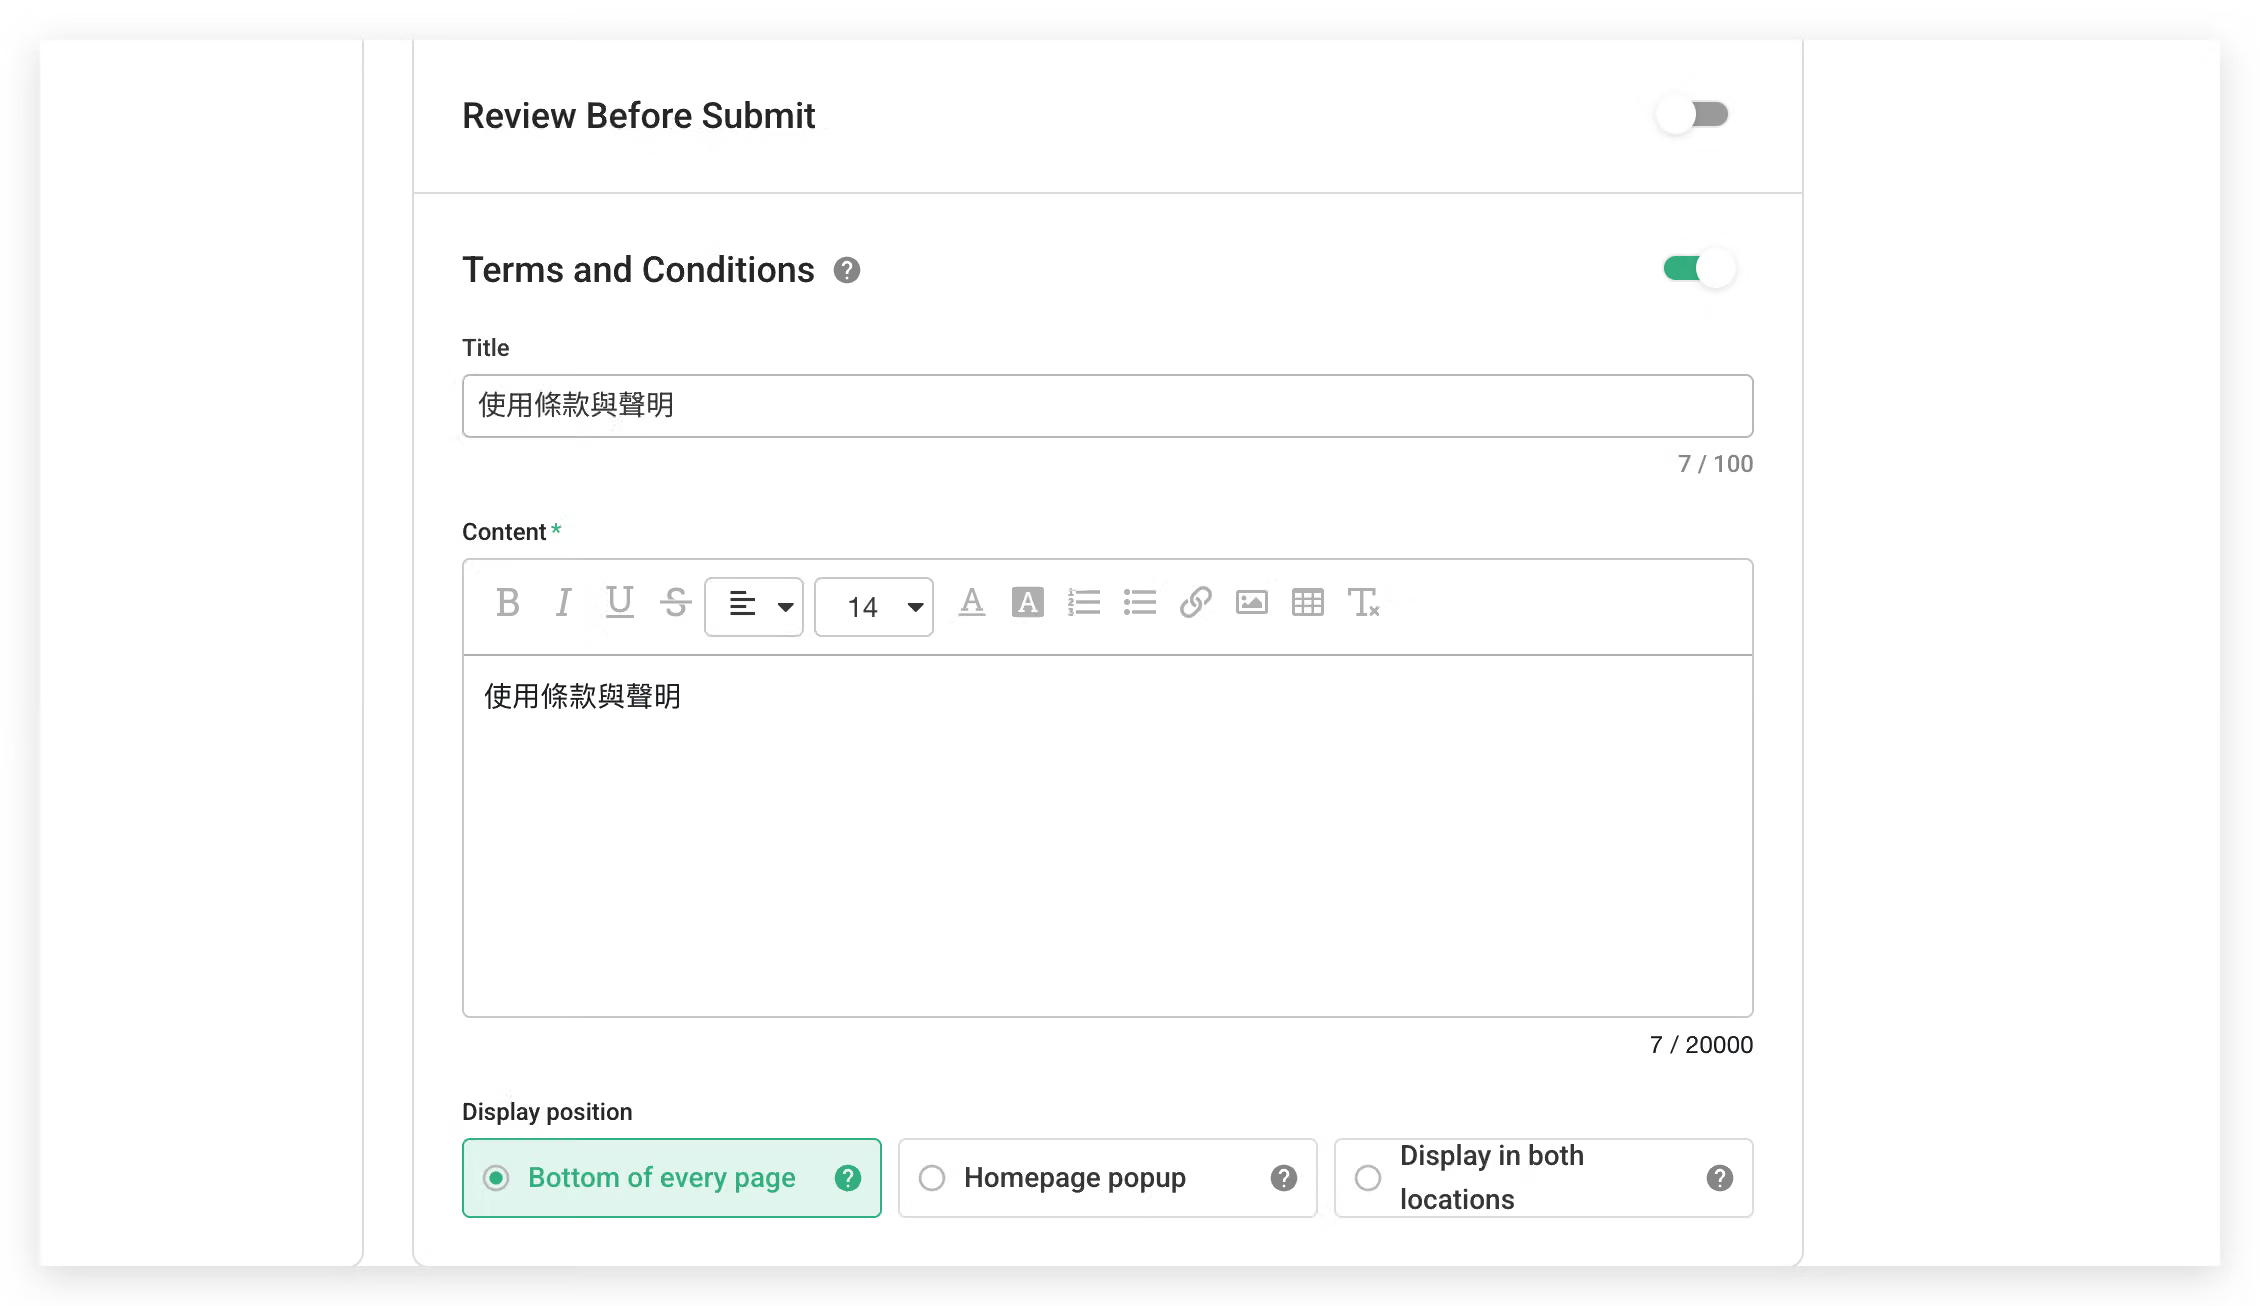
[Review Before Submit](https://www.surveycake.com/en/help-center/survey/review-before-submit
): When the button is turned on, a preview screen will appear after the respondents submit the survey. The function allows the respondents to reconfirm the information before they submit the survey formally
Terms and Conditions: Detailed terms, declarations, notes, and other information can be stated at the bottom of the survey page
The Enterprise Edition also offers advanced display settings, allowing you to customize the pop-up position and respondent confirmation behavior. For details, please refer to Terms & Conditions - Display Settings
Survey Results
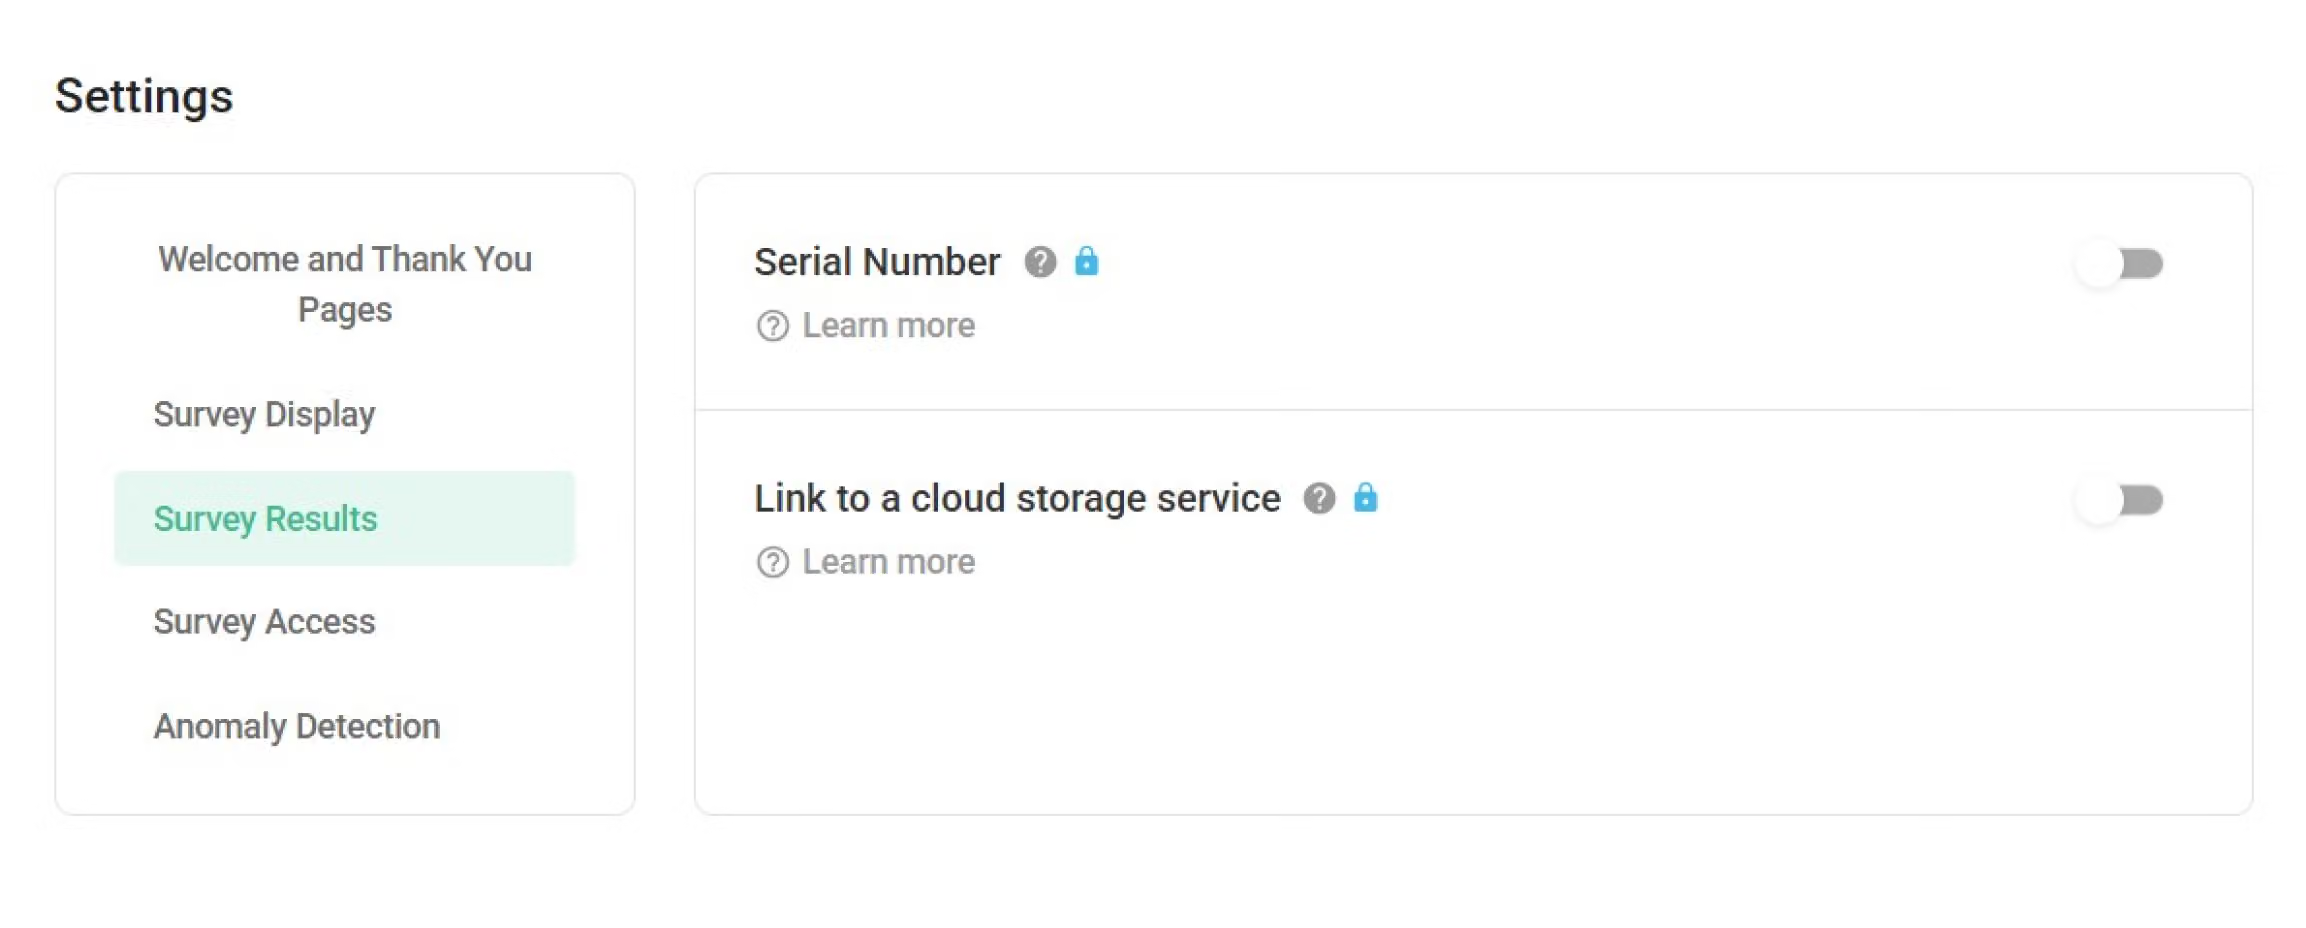
Serial Number: Randomly generate an independent serial number for each answer
Link to a cloud storage service: Link your Google Drive or OneDrive account to store the files uploaded by the respondents in the “File Upload” question. This feature must be activated if there is a “File Upload” question in the survey
If you enable the "Link to a cloud storage service" option on the Setup page without adding a File Upload question first, the toggle for "Link to a cloud storage service" will be automatically turned off after you publish the survey or leave the editing page.
Therefore, please make sure to add a File Upload question before enabling the "Link to a cloud storage service" option.
Survey Access
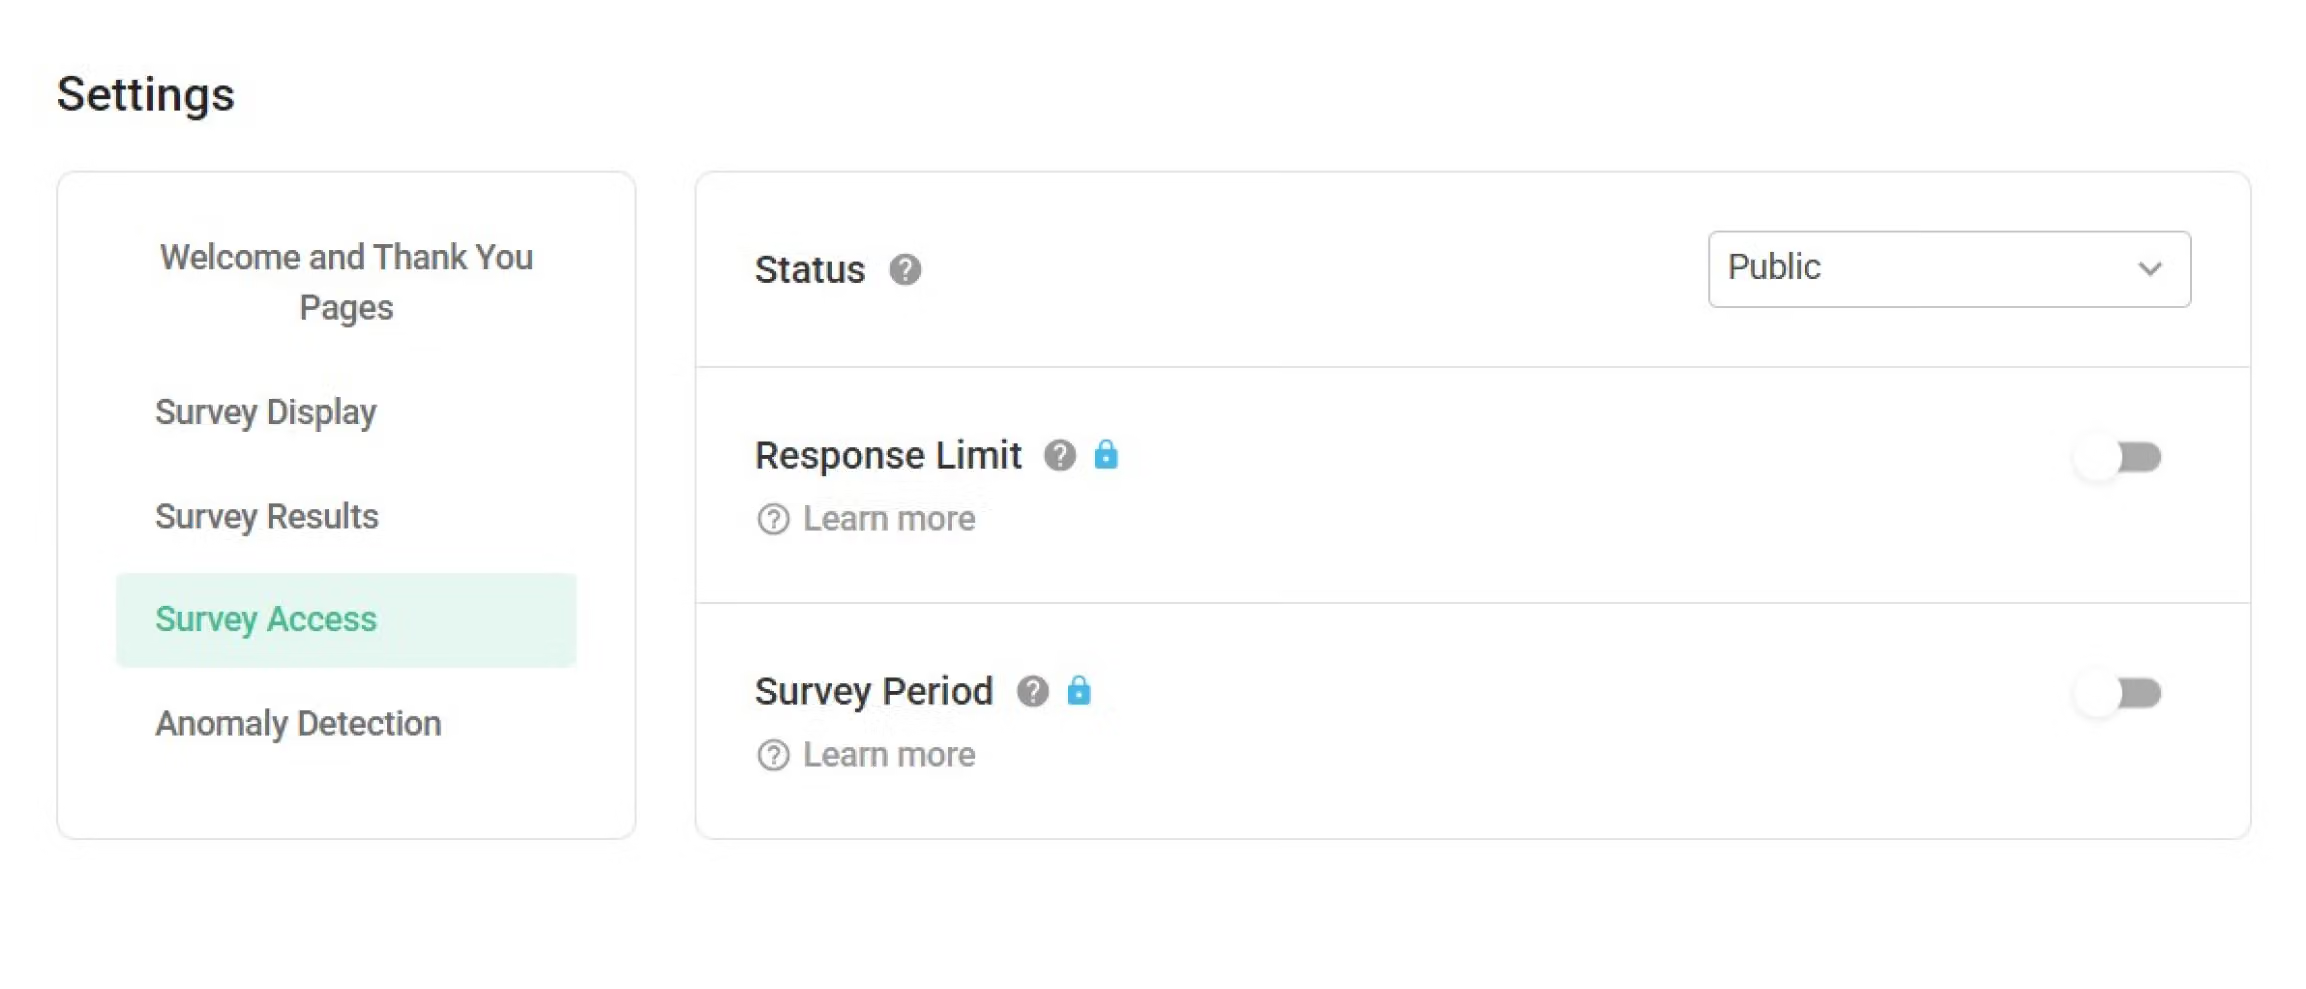
Status: Set up the availability of the survey (Public, Password-Protected, or Closed)
Response Limit: Set response limits for this survey (once the limit is reached, respondents are not able to access the survey)
Survey Period: Set the validity period of this survey
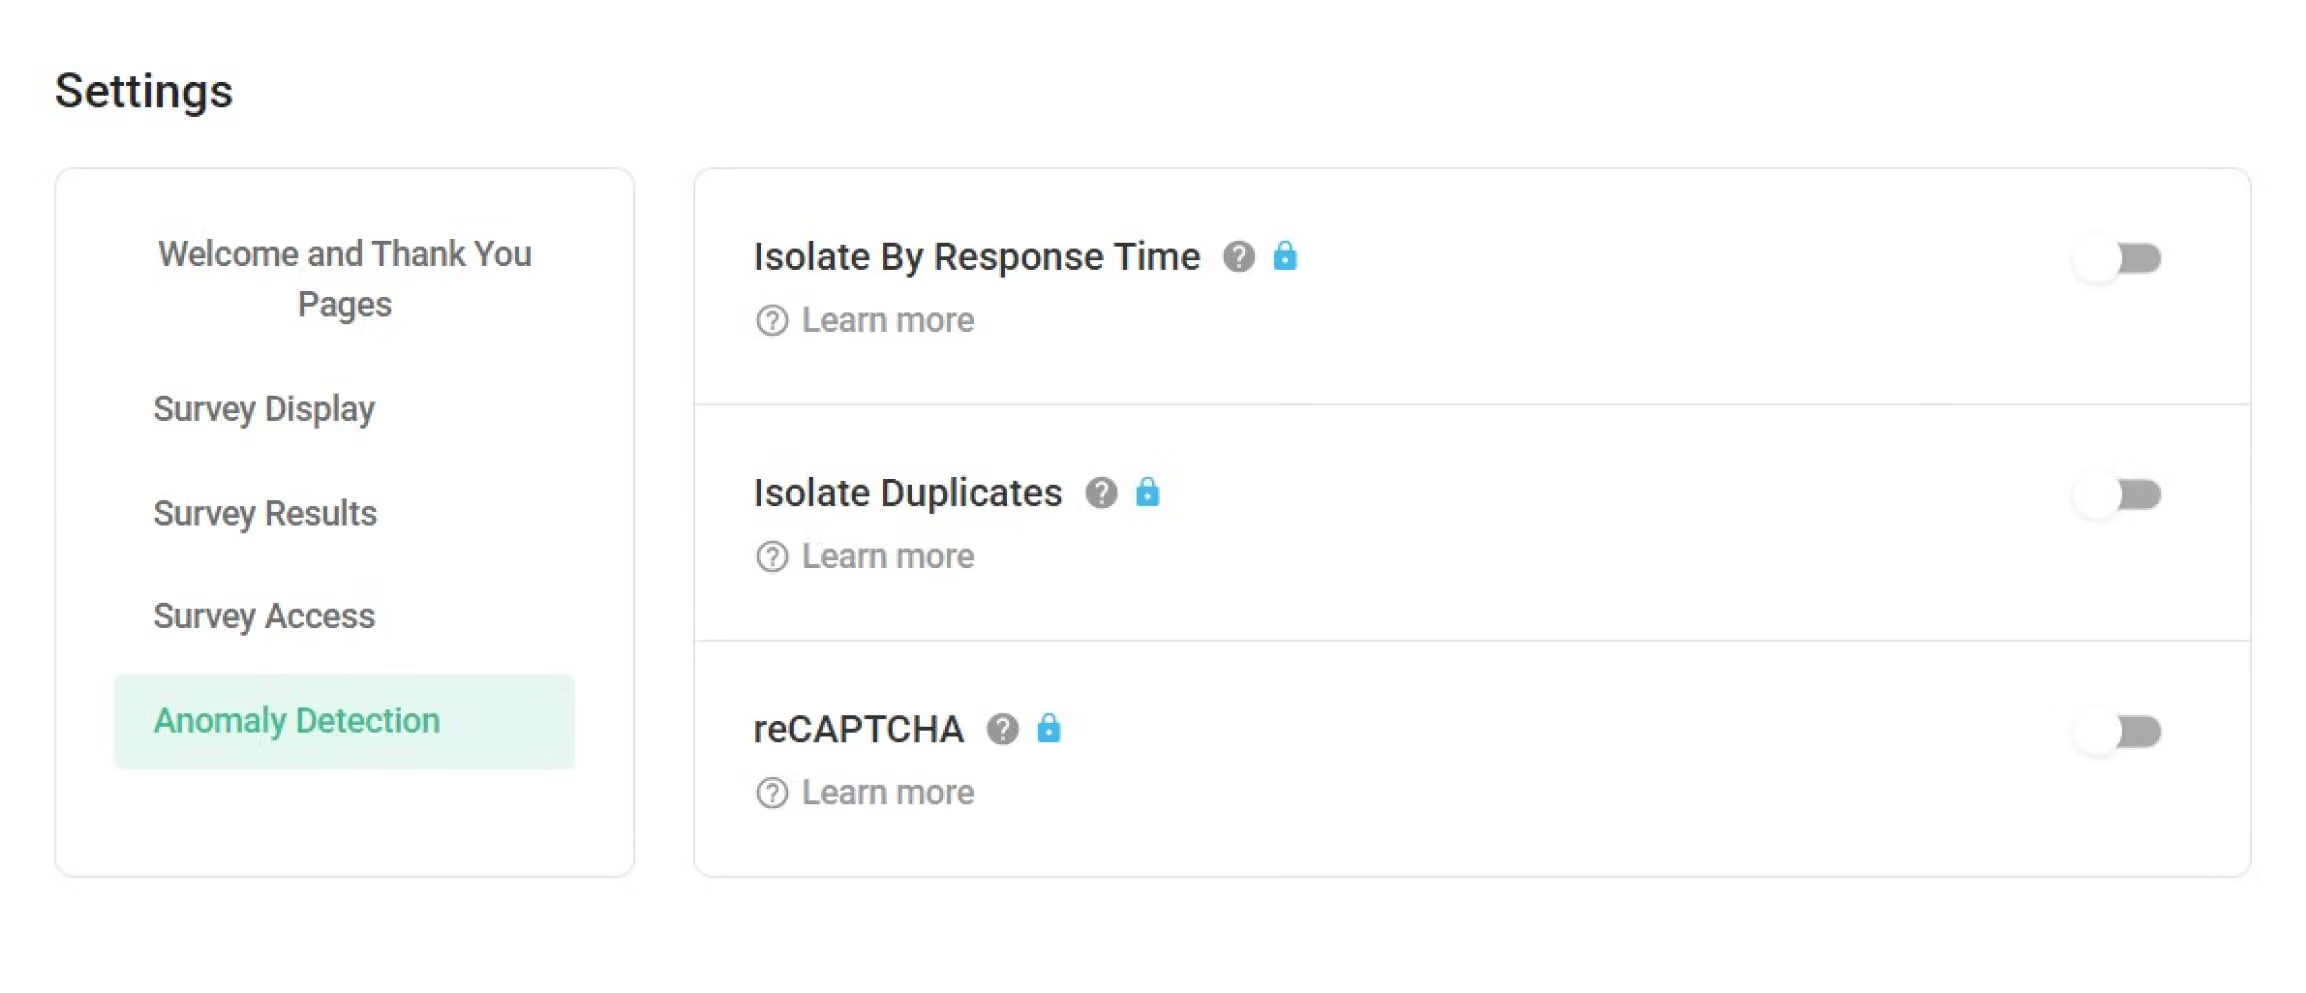
Anomaly detection
Isolate by Response Time: Responses that are less than the submitted time you set will automatically enter into the Quarantine
Isolate Duplicates: Multiple responses from the same browser will automatically enter into the Quarantine
reCAPTCHA: Verification mechanism to block malicious software
Besides the description above, you can also check the feature descriptions by moving your cursor to the small question mark next to each function name while editing your survey.